Soil treatment is a one of the most popular choices of the termite treatment.
There’re DIY products for making chemical barriers and professional-use-only termiticides.
It is considered to be highly effective. But is everything perfect about this fighting method and what are the tricky moments?
Hide content
- Which termites the soil treatment is good for?
- What is soil treatment?
- Useful articles
- Helpful video
- Conclusion
Which termites the soil treatment is good for?
Important to know that not all of the termites will be in focus when you perform the soil treatment.
Obviously, the barrier in soil is placed there to protect you from the threat which comes from the ground, and what will this threat be?
There’re two most common termite families, that can be destructive for your property. First are the drywood termites.
This is the termite that you can find anywhere in your house where you have an untreated piece of wood. You can find them in door and window sills, furniture or, in worst case, structural timber.
This termite needs no contact with soil. It can appear at your house after the swarm, if winged termites find a good place to nest in your cupboard. Or you might bring them in, for example, moving in with an infested furniture.Learn more about drywood termites: signs of their activity; best methods of treatment: spot treatment and DIY methods; how to get rid of them in furniture?
They nest where they eat and the whole colony might fit in one piece of wood on the early stage of the infestation. Logically, soil treatment will have no influence on these pests.
Subterranean termites are another story. Those ones for survival need an access to the moisture source. They don’t have the same ability of getting the water from the wood as drywood termites. They also prefer to have a good cover from the heat and sunlight.
For those reasons, the soil is the perfect nesting environment for them. So, usually, subterranean colony is happily living somewhere underground in your backyard, or even on your neighbor’s lawn, and visits your house for foraging.
Usually, they are the most attracted to the dark and humid parts of your building. They like the wood, that comes in contact with the soil, crawl spaces, damp construction elements. Most of the time you will find more signs of the infestation not higher than the ground floor in your house.
Subterranean termites are the species the soil treatment is oriented on. The creation of the chemical barrier, theoretically, should protect your property from the termites entering your building on the first place.
Learn more about subterranean termites: signs of their activity; best methods of treatment and DIY methods. Eastern subterranean termites and their tunnels and tubes with photo.
What is soil treatment?
The idea of the soil treatment is simple.
You soak the ground around your house with the strong termiticide that repels or kills all the termites that try to cross this line.
There’re two ways of doing the soil treatment:
- Pre-construction.
- Post-construction.
Here you can learn more information about effective termite control remedies: Bora-Care, Boric acid, Borate, Fipronil, Chlorpyrifos, Chlordane, Borax, Timbor, Termidor, Terminator, Phantom, Lorsban, Biflex, Terro. You can choose different forms, such as – foam, liquid, powder.
As the soil barrier is essentially a preventive method, the best protection you can get is the one you install on the place before even constructing the house.
This way you have a direct access to the soil and can make sure you don’t skip any small untreated space, where a tiny termite might squeeze through. If you also combine It with a physical barrier installed under the foundation, your protection will be almost impenetrable.
Attention! If your soil is not very good for the liquid termiticide to go through properly, the barrier treatment may require soil replacement around your building.Post-construction technique is a bit more complex for the execution. The idea stays the same – you need to make a border around your house that termites won’t dare to cross. But, after the house has been already built, to make this line of defense solid is much harder.
Often there’re some concrete areas around the house (driveway, pathway, playground) that block access to the ground. How to treat those areas? There’re two options:
- Drilling.
- Cutting.
Cutting the concrete out and then treating the soil underneath is ideal, but it’s a lot of work. So, mostly, the homeowners prefer drilling small holes with the distance of 100-200 mm between and injecting the diluted termiticide in them.
And this is where the weaknesses of soil treatment lay:
- Termites need a tiny entry point, just couple of millimeters wide, to find a way to your house. So, if with the injection in the holes you missed just an inch of soil – the protection has a flaw;
- Just enclosing your house in perfect circle is not enough – you have to think about all the pipes and other things that can be crossing you line of defense;
- To cover the whole area, depending on the size of your foundation, you will need hundreds of gallons of the termiticide dilution. Together with cutting and replacing the concrete is can be quite a costly treatment.
Here you can learn more information about termite bait systems: Advance, Green, CSIRO, Nemesis, Exterra, Firstline, Terminate. Also find out how to make baits by yourself and how to refill them?
Advice! If you decided to go full way and cut the concrete for the soil treatment, replace it with the paving stone – than it will be easier to refresh the barrier once it’s worn off.The action of the chemicals used nowadays in soil treatment lasts between 5-10 years. In 70s-80s there were other insecticides, that could guarantee longer protection, but it was proved, that the use of those chemicals brings too much damage to the wildlife.
Nowadays they are mostly prohibited for use. So you need to remember that once in a while you will need to renew your protection.
It’s also recommended to combine this method with the wood treatment. You better protect the wood which can come in direct contact with the soil, not to create additional entry points. Good news – there’re plenty of chemicals that can be used on wood, that last for the whole life of the timber.
With all the details and complications, the soil treatment would be something better trust to professionals. But there’re DIY products on the market too. They can be used by the homeowners experienced in termite fighting, who know well the structure of their house.
Or, it’s going to be good to use for protection of the simple objects, such as a post pole or a living tree.
Before pouring of the insecticide check few things:
- The forecast. It’ always better if there will be no rain in next 24 hours, so the insecticide will not be washed into the environment.
- That the soil is not oversaturated already. If it’s already soaked with water, for example after the heavy rain, it won’t absorb the termiticide the way it should.
- Make a throughout inspection to determine the best course of your barrier.
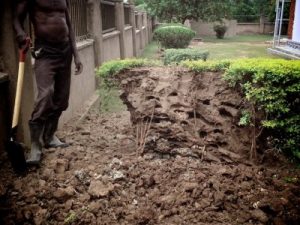
For the treatment you need to do few steps:
- Dig the trench about 6-12 inches wide and 6 inches’ deep.
- Prepare the dilution of the termiticide of your choosing, carefully following the label instructions.
- Use the bucket or a watering can for pouring the liquid into the trench, with the account for about 4 gallons per 10 linear feet.
- Place the soil back into the trench, mixing it with insecticide while you do so.
Useful articles
If you interested in more information of termites we recommend you to read the following articles:
- All types of termites. Are they harmful to humans? Can they bite you? And what is the difference between drywood and subterranean ones?
- What does swarmers of different species look like: drywood, subterranean, formosan?
- Signs of infestation outside and in the house: in walls or furniture.
- How to treat them at home and in the yard: in wood or in fence. How long this process lasts and what is pre-construction treatment?
- What does termite holes look like? What is droppings and is it toxic to humans? Do termites make noises?
- Posible termite damage, how does it look like? Examples of damage in walls and wood floors.
- All about flying termites: how do they look like, swarming season and what to do if there are swarmers in your house?
- How do they do nests and mounds? How to find it in your garden or inside the house?
- Termite life cycle – from egg to larvae. And social hierarchy: workers, soldiers, queen.
- Did you know that termites can infest living trees, for example a palm or a pine tree. They also like to live in stumps.
- You can prevent the infestation by using barriers, such as: HomeGuard, Physical systems, Safeguard, Stainless steel mesh, Kordon.
- If you want to get rid of termites naturally, learn more about such methods as: heat or cold treatment, orange oil, using nematodes.
Helpful video
Example of soil pre-treatment:
Conclusion
Even if you think that the chemical barrier was made in time and properly, keep your eyes open for the signs of infestation, such as mud tubes – covered passages built by termites.
Also if you see the swarm emerging from under the ground in your garden, maybe you should think about some baiting or other fighting methods.
Because, while your house is protected, the active colony on your land can find other things to eat – the fence, the kennel, firewood. And, knowing that your main property is protected, gives you plenty of time to work on the colony extermination.